How to Change a Tire: Step-by-Step Guide for Every Driver
A flat tire can strike without warning—during your morning commute, on a family road trip, or late at night on a deserted road. Knowing how to change a tire transforms a stressful emergency into a manageable 15-minute task. This skill ensures your safety, saves time waiting for roadside assistance, and provides peace of mind every time you drive. Master this essential skill and stay in control when the unexpected happens.
What You Need Before You Learn How to Change a Tire
Preparation is the foundation of a safe and successful tire change. Before a flat occurs, confirm that your vehicle has the required tools and that you know where they are How to Change a Tire stored. Driving without these essentials leaves you vulnerable in an emergency .
Essential Tools and Equipment
Every driver needs three primary tools to change a tire effectively. First, the jack—your vehicle’s lifting device, typically a scissor jack stored in the trunk or cargo area. Second, the lug wrench, also called a tire iron, used to loosen and tighten the wheel nuts. Third, a spare tire that holds proper inflation—check its pressure monthly, as spares lose air over time .
Check Your Vehicle Type
Not every car comes with a traditional spare. Some modern vehicles include run-flat tires designed for limited driving after a puncture, while others provide tire sealant kits for temporary repairs. If your vehicle lacks a spare, calling roadside assistance becomes your safest option .
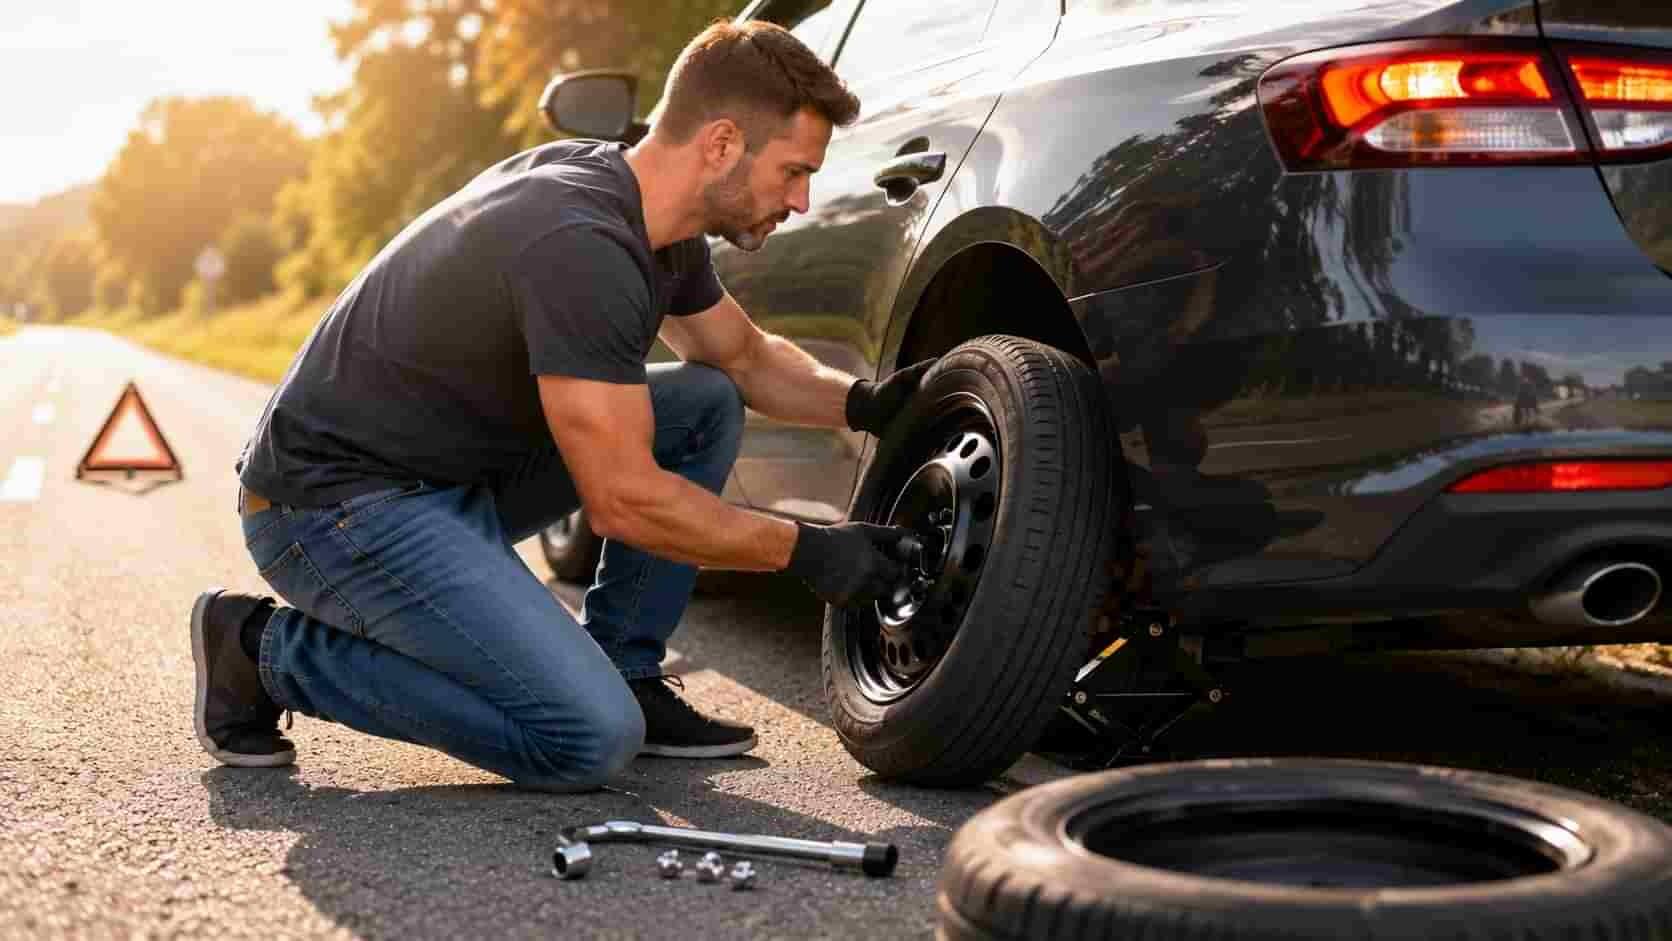
How to Change a Tire Safely: Step-by-Step Instructions
Follow these 10 steps to change a tire correctly and safely. Always prioritize personal safety and choose your work area carefully before beginning.
Step 1: Stop in a Safe Location
Pull completely off the road onto a level, solid surface. Avoid grass or soft shoulders—the jack needs firm ground for stability. Turn your steering wheel straight and engage the parking brake firmly. Switch on your hazard lights to alert other drivers .
Step 2: Gather Your Equipment
Retrieve the jack, lug wrench, and spare tire from their storage locations. Check your owner’s manual if you cannot locate these items. Place them beside the flat tire for easy access .
Step 3: Loosen the Lug Nuts—While the Tire Stays on the Ground
Position the lug wrench on each lug nut and turn counterclockwise. Loosen them enough to break their resistance, approximately a quarter to half turn. Never remove them How to Change a Tire completely at this stage. Keeping the tire on the ground prevents the wheel from spinning .
Step 4: Position the Jack Correctly
Locate the jack points under your vehicle—usually notched metal tabs behind the wheel well. Consult your owner’s manual for exact positioning. Placing the jack on the frame, not on body panels or suspension components, prevents costly damage .
Step 5: Raise the Vehicle
Turn the jack handle clockwise to lift the car. Continue raising until the flat tire clears the ground by about six inches. This clearance provides enough space to remove the flat and install the spare .
Step 6: Remove the Lug Nuts and Flat Tire
Finish unscrewing each lug nut by hand and place them in a secure location, such as a hubcap or pocket, so they cannot roll away. Grip the flat tire firmly with both hands, pull it straight toward you, and roll it safely aside .
Step 7: Install the Spare Tire
Lift the spare tire onto the wheel hub, aligning the holes with the wheel studs. Push it into place until it sits flush against the hub. Thread each lug nut back onto the studs How to Change a Tire by hand—this prevents cross-threading and ensures proper seating .
Step 8: Hand-Tighten the Lug Nuts
Tighten each lug nut as much as possible using only your fingers. This step ensures the wheel sits evenly on the hub before final tightening .
Step 9: Lower the Vehicle Partially
Turn the jack counterclockwise to lower the car until the spare tire barely touches the ground. This contact prevents the wheel from spinning while you tighten the lug nuts fully .
Step 10: Tighten the Lug Nuts in a Star Pattern
Use the lug wrench to tighten each lug nut firmly, following a star or crisscross pattern. This method ensures even pressure and prevents wheel wobble. Tighten each nut twice in sequence to guarantee security. Lower the vehicle completely, remove the jack, and give each lug nut one final check .
Understanding Your Spare Tire: Types and Limits
Spare tires come in different configurations, each with specific driving restrictions. Knowing which type your vehicle carries affects how far and fast you can drive after changing the tire.
Temporary “Donut” Spares
Most passenger vehicles include compact temporary spares—often called donuts—designed for emergencies only. These smaller tires limit your speed to 50 mph and distance to 50 miles. Never exceed these restrictions, as handling and braking performance decrease significantly .
Full-Size Spares
Some SUVs and trucks carry full-size spare tires matching your regular wheels. While these spares allow normal driving speeds, treat them as temporary replacements until you repair or replace the damaged tire .
Run-Flat Tires and Sealant Kits
Modern vehicles increasingly use run-flat tires, which allow continued driving at reduced speeds after a puncture—typically 50 miles at 50 mph. Other models include inflator sealant kits for temporary puncture repairs, but these may leave your tire irreparable .
Essential Safety Tips When You Change a Tire
Safety must remain your primary concern throughout the tire changing process. One mistake can lead to serious injury or vehicle damage.
- Never crawl under a vehicle supported only by a jack. Use jack stands if working beneath the car.
- Keep all passengers out of the vehicle while it is raised.
- Turn off the engine before beginning work.
- Place wheel chocks or heavy objects behind the diagonal opposite tire to prevent rolling.
- Work on level ground only—slopes invite disaster.
- Move away from traffic and keep your hazard lights on.
- Check your spare tire’s air pressure immediately after installation .
What to Do After You Change a Tire
After you change a tire, follow through on critical next steps to maintain safety and prevent future issues. Do not simply continue your journey indefinitely.
Visit a Tire Professional Immediately
Temporary spares are not permanent solutions. Drive directly to a tire shop—typically within 50 miles—to have your flat tire repaired or replaced. Never delay this visit, as spare tires lack the durability and performance of standard tires .
Check Your Spare Tire Pressure
Many spares lose pressure over time due to slow leaks. Use a tire gauge to confirm proper inflation before resuming normal driving. Underinflated spares affect handling and stability .
Re-inspect Your Lug Nuts
After driving approximately 50 miles, check your lug nuts again. Temperature changes and settling can cause slight loosening. A quick retightening ensures long-term security .
Common Challenges When You Change a Tire
Despite careful preparation, drivers encounter obstacles during How to Change a Tire tire changes. Understanding these challenges helps you overcome them quickly.
Lug Nuts Too Tight
Apply steady pressure to your lug wrench, or carefully step on the horizontal wrench handle with your foot. Ensure the wrench remains horizontal to avoid slipping .
Wheel Stuck on the Hub
Rust often bonds the wheel to the hub. Lower the jack slightly to place minimal weight on the wheel with the lug nuts removed—this breaks the corrosion seal. Then raise the vehicle again and remove the wheel .
Flat Tire in Heavy Traffic
Maintain calm and pull as far off the road as possible. If conditions feel unsafe, call for professional roadside assistance rather than risking your safety in high-speed traffic .
Frequently Asked Questions
Q: Should I loosen lug nuts before or after lifting the car?
A: Always loosen the lug nuts while the car remains on the ground. This prevents the wheel from spinning and ensures safety during the initial resistance-breaking step. Once loosened, you can lift the vehicle .
Q: How long can I drive on a spare tire after I change a tire?
A: Temporary “donut” spares allow driving up to 50 miles at speeds below How to Change a Tire 50 mph. Full-size spares permit normal driving but should still be replaced as soon as possible. Always check your owner’s manual for specific guidance .
Q: What tools do I need to change a tire?
A: The three essential items are a jack, lug wrench, and a properly inflated spare tire. Additional helpful tools include gloves, a tire pressure gauge, and a flashlight .
Q: Where do I place the jack under my car to change a tire safely?
A: Look for jack points—notched metal areas behind each wheel well. If unsure, consult your owner’s manual for exact jack placement. Never position the jack under body panels, suspension parts, or the differential .
Q: What should I do if my car doesn’t have a spare tire?
A: Check your owner’s manual for alternatives. Many vehicles come with run-flat tires or sealant/inflator kits. If equipped with neither, calling roadside assistance is your safest option .
Q: How do I know when my tires need replacing instead of just changing one?
A: Look for tread depth below 1.6mm, visible wear indicators across How to Change a Tire the tread, sidewall cracks, bulges, or vibration while driving. Regular tire inspections catch these issues before they become roadside emergencies .
Be Prepared to Change a Tire Anywhere
A flat tire is an inconvenience, not a disaster, How to Change a Tire when you carry the right knowledge and tools. Practice these steps in your driveway when conditions are calm. Familiarize yourself with your jack points and tool locations. This preparation transforms a stressful breakdown into a manageable task.